
Do you remember the first time you had banana pudding? It was magical, with cool cream, soft banana, and a crunchy wafer. That’s why you want to make the best banana pudding for your family. You want it to bring smiles and seconds.
Maybe you like Paula Deen’s layers with cream cheese and chessmen cookies. Or maybe Magnolia Bakery’s airy whipped-cream version is your go-to. This guide will help you make a creamy banana pudding that everyone will love. You’ll learn how to make it look as good as it tastes.
Table of Contents
Key Takeaways
- The best banana pudding balances creamy filling, tender banana slices, and crisp wafers.
- Paula Deen’s method uses cream cheese and sweetened condensed milk for a tangy richness.
- Magnolia Bakery favors whipped cream and careful chilling to avoid a watery pudding.
- Scratch-made custard gives the deepest flavor but needs tempering and patience.
- Slicing bananas right before serving and chilling properly preserves appearance and texture.
Why this is the best banana pudding recipe for your kitchen
This recipe offers the perfect mix of creamy filling and light whipped topping. It brings back the classic southern banana pudding. The wafers stay soft but not soggy.
What makes a great banana pudding
A great banana pudding has three key elements. It needs a smooth pudding or custard, fresh bananas, and cookie layers that start crisp and end up cake-like. Instant pudding should rest for a few hours to avoid being watery. Scratch custard gets its body from tempered egg yolks and cornstarch.
Use whipped cream or a mix of whipped cream and cream cheese. This adds lightness without making it too heavy.
Southern roots and modern variations
Banana pudding has deep roots in Black American communities. Traditional recipes use Nilla Wafers, vanilla pudding, and whipped cream. Modern versions, like Magnolia-style, add whipped cream to instant pudding.
Paula Deen’s recipes add cream cheese and sweetened condensed milk for extra richness. Scratch custards can be flavored with vanilla bean or banana extract for more depth.
Why you’ll love this version: creamy texture, balanced sweetness, and wafer layers
This version aims for a light, fluffy finish. It uses whipped cream or a cream cheese-sweetened-condensed-milk mix for body. The sweetness lets the bananas stand out.
Layered Nilla Wafers or buttery cookies add a nostalgic touch. They soften to a tender crumb after resting, making this banana pudding a delight in taste and texture.
banana pudding: key ingredients and pantry swaps
Great banana pudding comes from simple pantry items and smart swaps. This section covers each ingredient’s role. It also guides you on when to use instant mixes or make custard from scratch. Follow these tips to make an easy banana pudding or a richer homemade version.
Essential ingredients explained
Bananas add aroma, sweetness, and texture. Choose bananas that are barely ripe to slow browning and keep them firm. For a 9×13 pan, use 6–8 bananas. Magnolia-style spreads need about 4 cups of sliced bananas for bigger batches.
Pudding sets the flavor. Instant vanilla or French vanilla pudding mix makes assembly quick and consistent. Scratch custard, made with milk, heavy cream, egg yolks, cornstarch, and sugar, adds depth and a silky feel.
Nilla Wafers are the classic cookie layer that softens into cake-like ribbons after chilling. You can swap in Keebler or Pepperidge Farm Chessmen for a different crunch and flavor. Both work well in banana pudding with vanilla wafers.
Whipped cream tops the dish and lightens texture. Freshly whipped heavy cream beaten to stiff peaks keeps a natural taste. For more stability, fold in cream cheese or use a stabilized whipped cream blend.
Instant pudding vs. scratch-made custard — pros and cons
Instant pudding is quick. Brands like Jell-O and store-bought French vanilla mixes let you assemble fast without stovetop work. Magnolia and Paula Deen often use instant mixes with sweetened condensed milk for a creamy, ready-in-minutes finish.
Scratch custard has stronger flavor. Using egg yolks and butter creates a custard with richness that instant mixes can’t match. It takes more time to temper and cool, but the result is a homemade banana pudding with a luxurious mouthfeel.
The choice is simple: instant for an easy banana pudding that’s quick and consistent. Scratch for more complexity and extra effort.
Common substitutions and why they work
French vanilla instant pudding adds extra custard notes and amplifies vanilla flavor without changing technique. Sweetened condensed milk contributes body and shortcut sweetness; Magnolia-style mixes often beat condensed milk with cold water before adding pudding mix for a silky base.
Cream cheese brings tang and structure when folded into whipped topping. Paula Deen uses it to lend stability and richness to her banana desserts. Heavy cream whips to stiff peaks and provides the purest whipped topping for a classic homemade banana pudding.
| Ingredient | Role | Common Swap | Why It Works |
|---|---|---|---|
| Bananas | Fresh flavor, texture | Barely ripe vs. ripe | Barely ripe slices brown slower and hold shape for better presentation |
| Instant pudding mix | Quick thickening and flavor | French vanilla instant | Boosts vanilla/custard notes without extra steps |
| Scratch custard | Depth and luxury | Egg yolks + cornstarch | Creates richer, silkier texture than instant mixes |
| Nilla Wafers | Layered cookie texture | Keebler or Pepperidge Farm Chessmen | Similar structure; slight flavor/shape differences that add variety |
| Sweetened condensed milk | Sweetness and body | Granulated sugar + cream | Condensed milk simplifies sweetening and thickens without cooking |
| Whipped cream | Light topping, texture contrast | Cream cheese fold-in or Cool Whip | Cream cheese adds tang and stability; Cool Whip offers convenience |
Choosing the best bananas and preventing browning
Choosing the right bananas is key for a great banana pudding. Look for bananas that are firm and have a slight green at the stem. These bananas will hold their shape better and brown slower than ripe ones.
How ripe your bananas should be and why
Magnolia Bakery and many home bakers suggest using bananas that are barely ripe. This means they have a slight green stem. This makes them firmer and less likely to turn mushy in the pudding.
Techniques to slow browning
To slow down browning, brush banana slices with lemon juice. You can also use pineapple, apple, or orange juice for a different taste. Brushing helps prevent the fruit from getting too wet.
Another trick is to rinse banana slices in club soda quickly. This method keeps the flavor intact. But avoid using tonic water, as it can change the taste of your banana pudding.
Keep the layers tightly covered after you assemble them. Use plastic wrap directly on the pudding to prevent a skin from forming. Make sure the pudding covers the banana slices in each layer.
Timing advice: when to slice and when to assemble
Slice bananas just before you assemble the pudding. Prepare the pudding base ahead of time to save effort. Then, slice and layer the bananas within a few hours of serving.
For the best results, set the pudding base three to four hours or overnight. Slice the bananas and assemble the dessert within four to eight hours of serving. This keeps the dessert looking and tasting great for your guests.
Step-by-step: easy banana pudding recipe using instant pudding
Begin with a clear plan to ensure your assembly is quick and clean. This recipe follows the Magnolia banana pudding method. It creates a light, firm base that prevents a watery finish.
Preparing the pudding base like Magnolia Bakery: condensed milk + cold water + instant vanilla
Pour one 14-ounce can of sweetened condensed milk into a bowl. Add 1 1/2 cups of ice-cold water and mix for about one minute. Then, sprinkle in one 3.4-ounce box of instant vanilla pudding mix and mix for two minutes.
Cover and chill for three to four hours or overnight. Magnolia Bakery advises against under-chilling, as it can make the pudding watery.
Whipping and folding in cream for a light finish
Whip three cups of heavy cream until stiff peaks form in another bowl. Gently fold the whipped cream into the chilled pudding until smooth. Use a rubber spatula for wide, gentle strokes to keep it airy.
For a richer taste, blend the instant pudding with milk. Then, fold in a cream cheese and whipped topping mix for a tangier, denser pudding.
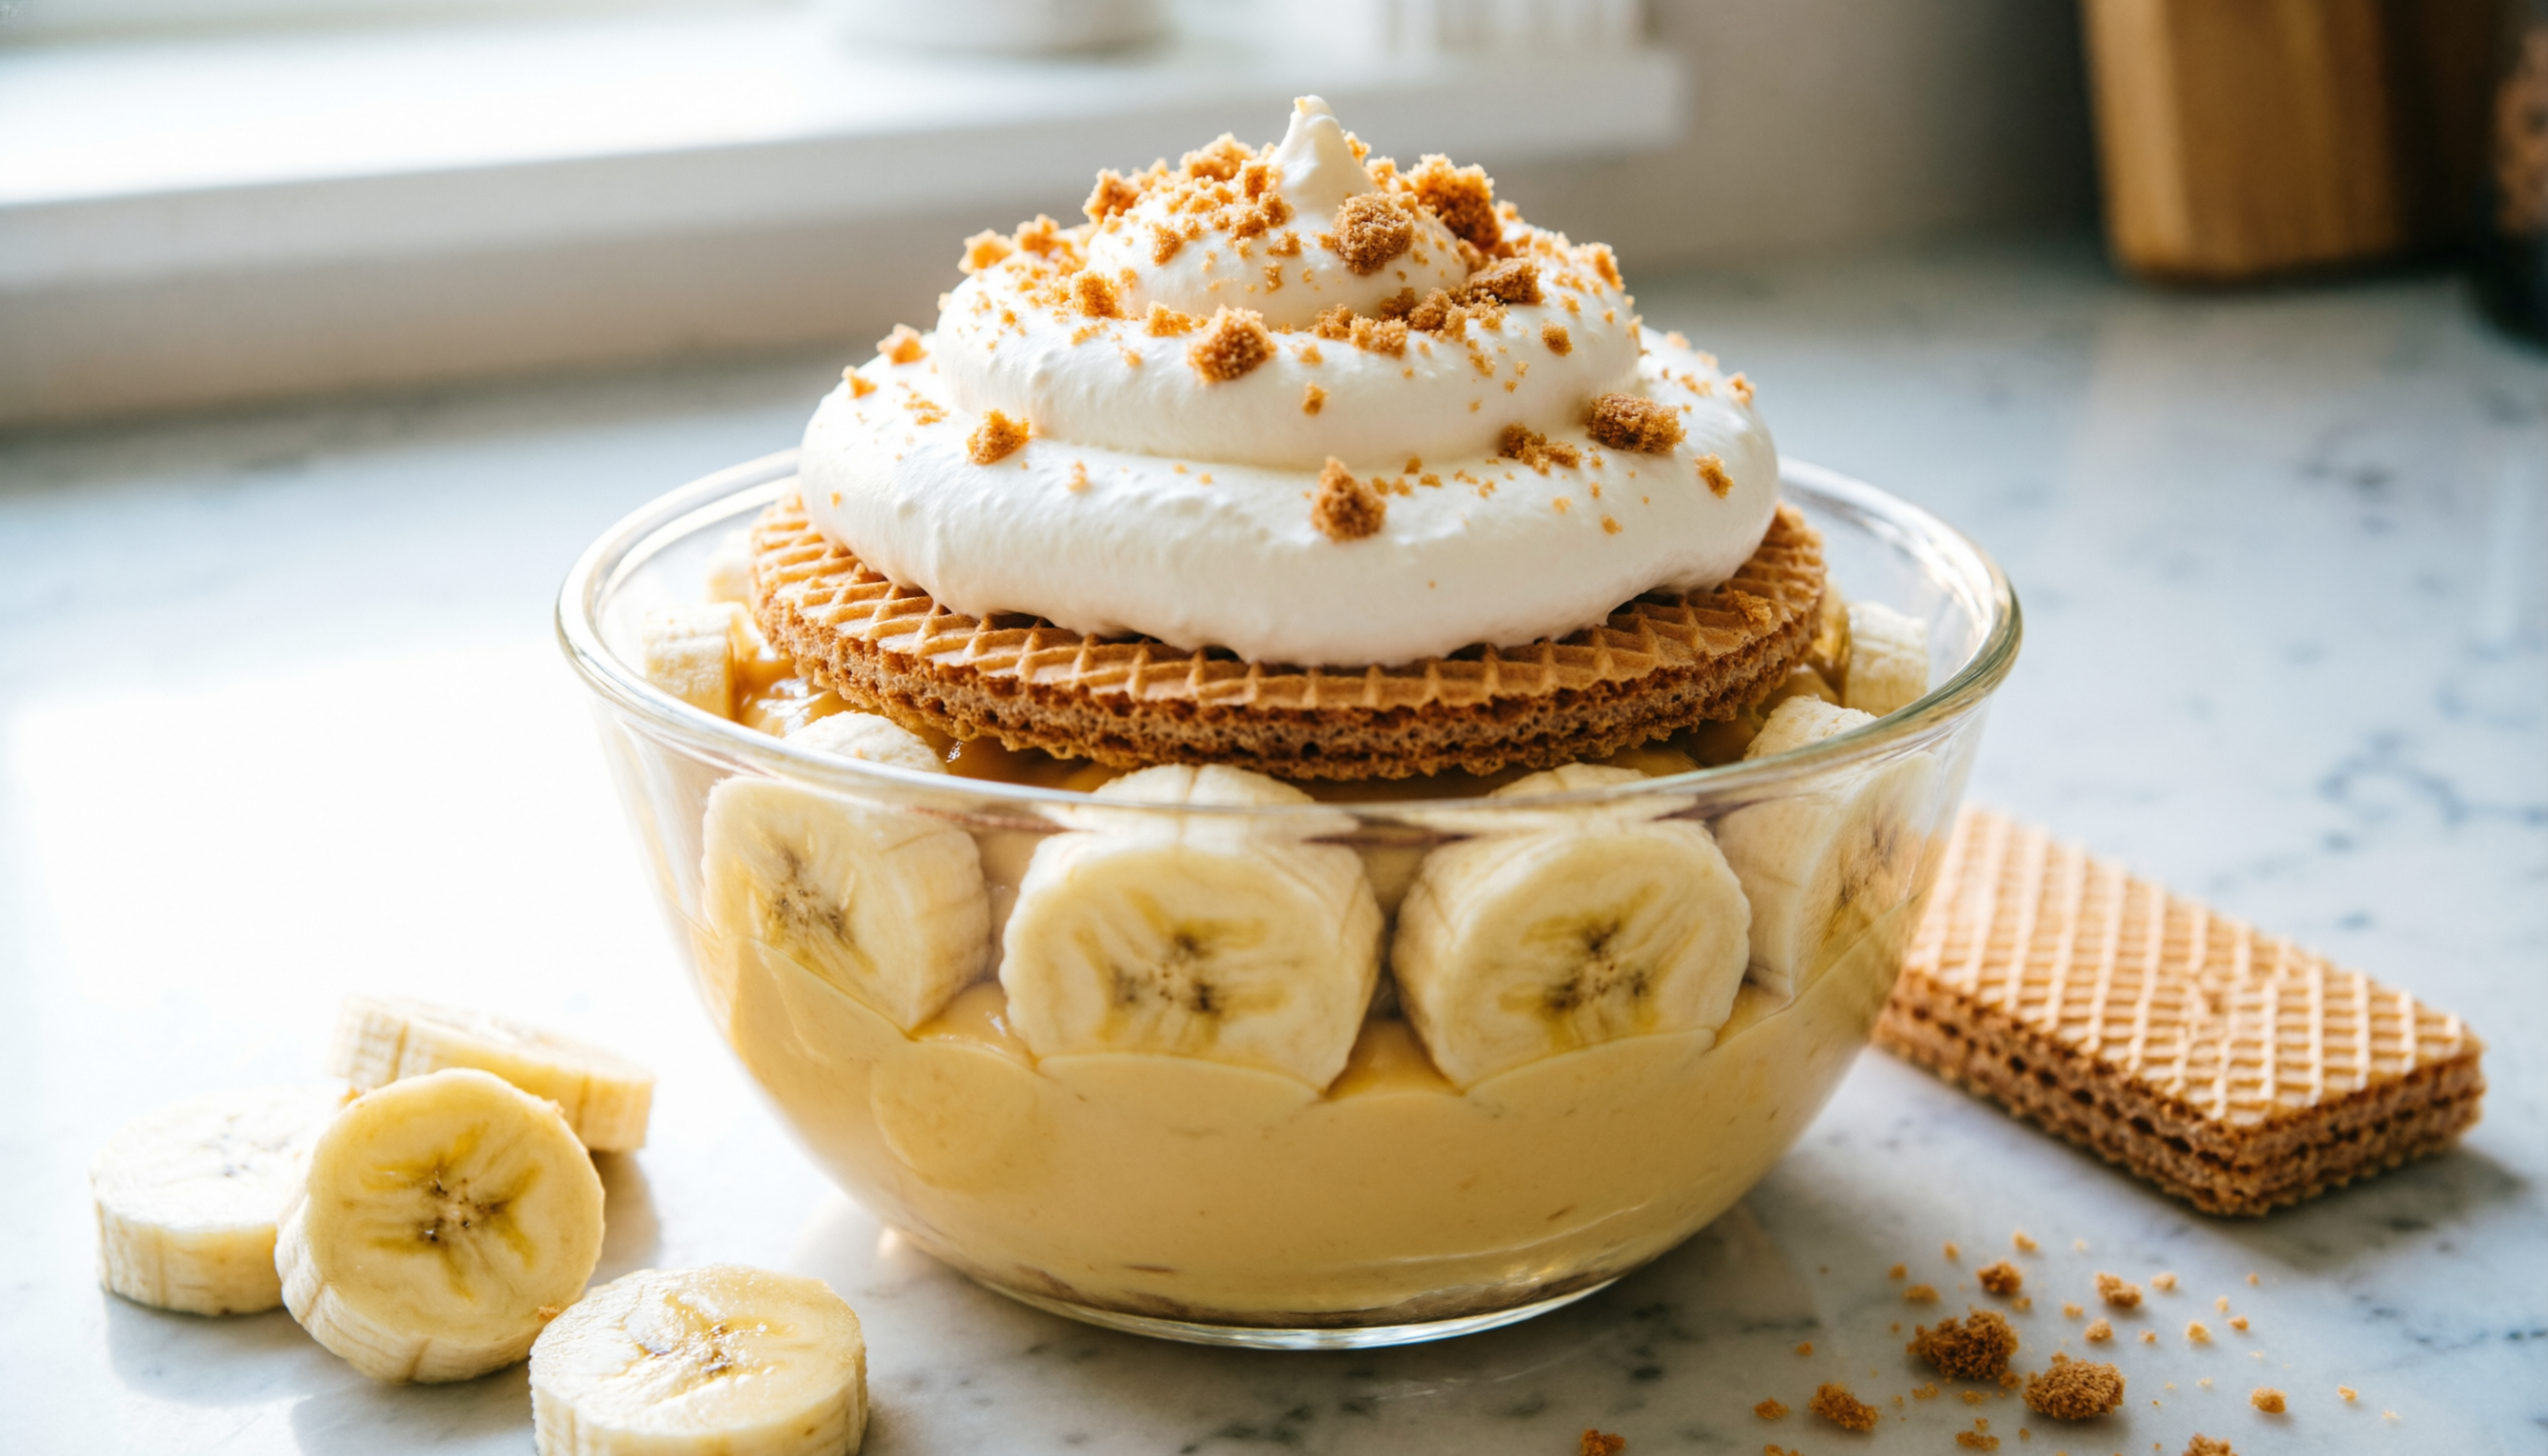
Layering method with Nilla wafers and banana slices
Use a 4–5 quart trifle bowl or a 9×13-inch pan for the best look. Start by covering the bottom with about one-third of the Nilla wafers. Add one-third of the banana slices in a single layer.
Spoon one-third of the pudding mixture over the bananas and smooth it. Repeat this two more times, ending with pudding on top. Garnish with extra wafers or crushed crumbs for texture. Cover tightly and chill for at least four hours but no more than eight hours before serving.
Step-by-step: classic homemade banana pudding from scratch
You’ll make a custard that’s rich and full of real vanilla flavor. This recipe focuses on technique. This way, your layers stay distinct and your flavors bright.
Making a custard base: tempering egg yolks and thickening with cornstarch
Warm whole milk and heavy cream in a saucepan until hot but not boiling. Whisk egg yolks with sugar, cornstarch, and vanilla bean paste into a smooth paste.
Temper the yolks by whisking in a tablespoon of the hot cream, repeating two to three times. Return the mix to the pan and whisk over medium heat until thick, about four to five minutes. This scratch-made custard makes a silky base for your homemade banana pudding.
Adding butter, vanilla, and optional banana extract for extra depth
Remove the pan from heat and stir in cubed salted butter until melted for a glossy finish. Fold in more vanilla bean paste to deepen the flavor. If you want a hint of banana, add one tablespoon of banana or banana-cream extract.
These small additions enhance the custard without hiding the fresh banana slices you’ll layer later.
Cooling, covering with plastic to avoid skin, and chilling times
Transfer the hot custard to a bowl and press plastic wrap directly onto the surface to prevent a skin. Let it cool to room temperature, then chill for at least four hours or overnight for best texture.
When the custard is fully chilled, assemble with Nilla Wafers and whipped topping. Store the assembled homemade banana pudding in the refrigerator. Wafers will soften and bananas will brown over time. So, plan to serve within a couple of days for best appearance and taste.
Creamy toppings and assembly options for best banana pudding
Choose a topping that matches your goal for texture and sweetness. A lighter finish highlights the banana flavor. A richer topping holds up at potlucks and keeps layers neat. Think about how you will serve the banana pudding dessert when you pick your approach.
Whipped cream gives you a classic, airy finish. For a Magnolia banana pudding style, whip heavy cream to stiff peaks and fold it gently into the pudding. The result is delicate and fresh, ideal for a creamy banana pudding recipe that feels light on the palate.
Stabilized whipped cream and Cool Whip offer longer hold time. Paula Deen banana pudding leans toward a richer, more stable filling by combining sweetened whipped cream or frozen whipped topping with cream cheese and sweetened condensed milk. This keeps layers firm during transport and serving.
Cream cheese additions change flavor and mouthfeel. When you add cream cheese, the topping turns tangy, denser, and richer. This works well in recipes that call for sweetened condensed milk and matches Paula Deen banana pudding’s sweeter profile. If you skip cream cheese, your topping stays airy and classic, closer to Magnolia banana pudding.
Follow a simple assembly order for best results. Start with a layer of pudding, add a single layer of wafers, place banana slices, then a layer of creamy topping. Repeat until your dish is full. Reserve extra wafers and banana slices for a final garnish just before serving.
Pick a serving format to fit your occasion. Use a large trifle bowl or a 9×13 pan for family-style gatherings. Choose individual cups or parfait glasses for parties and portion control. Individual servings let you craft neat layers and eye-catching presentations for each guest.
Storage, make-ahead tips, and how long it keeps
To keep your banana pudding fresh, store it in the fridge and cover it. Use an airtight container or press plastic wrap on the surface. This helps prevent banana slices from browning and wafers from getting soft.
How to store assembled pudding and expected shelf life
Put your banana pudding in the fridge. It will stay best for 2–3 days. Over time, wafers will soften and bananas will brown, but the taste remains good.
Magnolia suggests serving it sooner for the best look. Recipes with cream cheese and condensed milk last a bit longer in the fridge.
Best make-ahead strategy
Plan ahead by preparing parts of your banana pudding in advance. Chill the pudding base for 3–4 hours or overnight. If you make a scratch custard, do it a day before to let the flavors mix.
Slice bananas and layer everything on the day you plan to serve. Try to assemble within 4–8 hours before serving. This keeps the pudding fresh and looking great.
Freezing considerations and refrigeration advice
Don’t freeze assembled banana pudding. Bananas get mushy, wafers lose crispness, and whipped toppings separate when thawed. Instead, refrigerate components separately if you need more time.
Keep the pudding base chilled, store wafers in an airtight container, and slice bananas just before assembling. If you have leftovers, cover them tightly and refrigerate. Use them within 2–3 days for the best taste and texture.
Troubleshooting common banana pudding problems
Having trouble with your banana pudding? This quick guide can help fix texture and flavor issues without starting over. Follow each tip and try the simple fixes to save your dessert and keep everyone happy.
Watery pudding: causes and fixes.
Instant pudding that’s too thin? Magnolia Bakery suggests chilling it for 3–4 hours or overnight. To fix watery pudding, chill the instant mixture until it’s firm. Then, fold in whipped cream.
Is your scratch custard too runny? Check the cornstarch ratio and heat it again. Stir constantly until it thickens. For a softer texture, mix in stabilized whipped cream or whipped cream with a bit of mascarpone.
Preventing soggy wafers.
Soggy wafers come from cookies sitting too long or wrong layering. Use equal parts wafers, bananas, and pudding for three layers. Assemble just before serving for crunch.
Avoid pouring too much, which can drown the top layer. For a firmer texture, try Pepperidge Farm Chessmen or shortbread cookies instead of Nilla wafers. This change keeps the classic taste without soggy wafers.
Fixing overly sweet or flat flavor.
Too sweet? Reduce sweetened condensed milk or less sugar in the custard. Choose plain vanilla pudding for less sweetness but creamier taste.
Flat flavor? Add real vanilla extract, vanilla bean paste, or butter to the custard for depth. For a better flavor, add cream cheese to the topping or a splash of bourbon. These tweaks enhance the banana pudding’s taste without hiding the banana flavor.
Quick checklist before serving:
- Chill instant pudding fully for a firm set.
- Layer in equal portions to avoid soggy wafers.
- Adjust sweeteners or add vanilla bean paste for better banana pudding flavor balance.
- Use sturdier cookies if you want texture that holds up over time.
Conclusion
Creating the best banana pudding depends on the moment. For quick results, use Magnolia-style instant pudding, sweetened condensed milk, and whipped cream. This combo is fast and classic.
For a richer dessert, try Paula Deen–inspired mixes. These include cream cheese and French vanilla instant pudding. They make the pudding sweeter and more comforting.
The classic banana pudding recipe from scratch offers the most complex flavor. It uses cornstarch for thickening and butter and vanilla for finishing. This method gives a silky texture.
For success, use barely ripe bananas to slow browning. Chill the instant pudding for 3–4 hours to avoid a watery finish. Press plastic wrap on hot custard to prevent skin formation. Assemble the pudding closer to serving time, ideally within 4–8 hours.
Keep your pudding refrigerated for the best quality. It stays good for about 2–3 days. Over time, wafers will soften and bananas will brown.
Don’t be afraid to try new things. Swap Nilla Wafers for shortbread or Pepperidge Farm Chessmen. Adjust sweetness with less condensed milk or a bit more sugar. Choose from fresh whipped cream to a stabilized cream cheese mix or Cool Whip for toppings.
By following these steps and tips, you’ll create your own signature banana pudding. Whether you choose a quick instant mix, a Paula Deen–style comfort version, or a scratch-made custard, you’ll impress everyone. Your pudding will be a hit, with its perfect balance of banana flavor, creamy texture, and sweetness.