
Enjoying a Chocolate Ice Cream Sandwich on a warm summer day brings back happy memories. You might remember being a kid, with the sun shining and laughter everywhere. That first bite of a homemade ice cream sandwich was always special.
Creating your own ice cream sandwiches is a fun way to make new memories. You can mix rich chocolate cookies with your favorite homemade ice cream. With a few quality ingredients and some effort, you can relive those happy moments and create new ones.
Table of Contents
Key Takeaways
- Making your own Chocolate Ice Cream Sandwich allows for personalization and creativity.
- Quality ingredients make a significant difference in flavor.
- Homemade ice cream adds a unique touch to your frozen treats.
- Assembly is simple and fun, perfect for all ages.
- Chocolate Ice Cream Sandwiches can be customized to match your mood and preferences.
Introduction to Chocolate Ice Cream Sandwiches
Chocolate Ice Cream Sandwiches bring back memories of happy summers. They are a favorite dessert that has been loved for many years. The mix of soft chocolate cookies and cool ice cream brings joy to everyone who tries them.
These treats are loved for their rich flavors and versatility. You can use different types of cookies and ice cream to make them your own. As summer comes, they are a great way to enjoy cool treats with loved ones. Making your own Chocolate Ice Cream Sandwiches can create special memories.
Why Choose Homemade Ice Cream Sandwiches?
Making your own ice cream sandwiches has many benefits. You control the ingredients, ensuring they’re fresh and without preservatives. This means better taste and texture, making every bite a joy.
Another great reason is the ability to customize. You can try different ice cream flavors, from vanilla to mint chocolate chip. This lets you create treats that everyone will love, no matter their taste.
Essential Ingredients for Your Chocolate Ice Cream Sandwich
Making chocolate ice cream sandwiches is all about the right ingredients. The key is to find a balance of flavor and texture. You’ll need two main things: chocolate cookies and ice cream filling.
Chocolate Cookies
To make the chocolate cookies, you’ll need a few important ingredients. These will make them rich and soft. Here’s what you’ll need:
- All-purpose flour
- Dutch-process cocoa powder
- Unsalted butter
- Granulated sugar and brown sugar
- Vanilla extract
These ingredients mix together to make a tasty cookie base. It pairs perfectly with the ice cream filling.
Ice Cream Filling
Choosing the right ice cream is key for your sandwiches. You can pick classic flavors like vanilla or chocolate. Or, try something new to excite your taste buds.
The ice cream should be creamy and rich. This will contrast well with the chocolate cookies. Pick a flavor that you love and goes well with the cookies.
Preparing the Chocolate Cookie Base

Making the perfect chocolate cookie base is key for a great ice cream sandwich. Start by mixing the ingredients well. This ensures a balanced flavor and texture. You’ll mix dry and wet ingredients separately to get a delicious cookie batter.
Mixing Dry Ingredients
First, mix flour, cocoa powder, baking soda, and salt in a bowl. This step is important for the cookie’s structure. It helps distribute the leavening agents evenly, creating a rich chocolate flavor and fine texture.
Combining Wet Ingredients
Then, mix softened butter with sugars until it’s light and fluffy. Add milk and vanilla extract, blending until smooth. After that, fold the wet ingredients into the dry mixture. This creates a tender cookie batter that’s perfect with ice cream.
Baking the Chocolate Cookies
Start by preheating your oven to 350°F (175°C). Line your baking sheet with parchment paper for easy cleanup. Scoop the cookie dough into uniform dollops, leaving enough space between each cookie.
Put the baking sheet in the oven and bake for about 9 to 10 minutes. This will help your cookies bake evenly.
A great chocolate cookie texture is key for a tasty ice cream sandwich. You want them to be firm around the edges but soft in the middle. This balance is important for keeping the cookies’ shape when frozen.
Keep an eye on the cookies during the last few minutes of baking. This ensures they get the perfect texture.
After baking, let the cookies cool on the baking sheet for a few minutes. Then, transfer them to a wire rack to cool completely. This step is important for achieving the right texture for your ice cream sandwich.
Making the Perfect Ice Cream Filling

Creating the perfect ice cream filling is key for a great chocolate ice cream sandwich. The right mix of flavors makes every bite a joy. Your ice cream choice greatly affects the taste of your sandwich.
Selecting Your Ice Cream Flavor
Vanilla is a classic choice that pairs well with chocolate cookies. But, if you’re feeling bold, try mint chocolate chip or strawberry. These flavors add a unique twist that makes your sandwich unforgettable.
Softening the Ice Cream for Assembly
Once you’ve picked your flavor, it’s time to get ready to assemble. Softening the ice cream is important for easy spreading. Let it sit at room temperature for 15 minutes. This makes it smooth and prevents cookie breakage.
Assembling Your Chocolate Ice Cream Sandwich
Assembling sandwiches can be fun, like with chocolate ice cream ones. Start by placing a chocolate cookie upside down on a cold baking sheet. This makes a solid base for the ice cream. Make sure the ice cream is soft for the best results.
Layering the Ice Cream
Spread the softened ice cream evenly on the bottom cookie with a scoop. Try to cover the cookie completely for a uniform layer. This step is important to keep the ice cream in place when adding the top cookie.
A well-layered ice cream sandwich looks great and tastes amazing.
Shaping Your Sandwiches
Now, place another chocolate cookie on top of the ice cream. Press down gently to hold the ice cream in place. It’s important to apply even pressure for a balanced sandwich.
Shape the sandwiches carefully to avoid any unevenness. A neat presentation makes the sandwich more enjoyable to eat.
Freezing and Storing Your Sandwiches
After making your chocolate ice cream sandwiches, it’s important to freeze them right. First, wrap each sandwich tightly in plastic wrap. This helps prevent freezer burn and keeps them fresh and tasty.
For extra protection, put the wrapped sandwiches in a zip-top bag or airtight container. This way, they stay fresh longer in the freezer.
For the best taste, let your sandwiches freeze for at least 3 hours before eating. This time lets the flavors mix well and the cookies soak up the ice cream’s moisture. This makes them even better in texture and taste.
If you freeze them correctly, your treats can last up to a month. So, you can enjoy them whenever you want!
Customizing Your Chocolate Ice Cream Sandwich
Creating unique chocolate ice cream sandwiches lets you get creative in the kitchen. Start by trying different ice cream flavors. You can choose from fruity, nutty, or even savory options. The possibilities are endless.
Changing up your cookie choices can also make a big difference. Try using peanut butter cookies or chocolate chip ones to mix things up. This adds a new twist to the classic combo.
Flavor Variations
- Traditional chocolate ice cream
- Strawberry swirl
- Mint chocolate chip
- Peanut butter cup
- Cookies and cream
Mixing and Matching Ingredients
To make your ice cream sandwiches even better, add toppings like mini chocolate chips or chopped nuts. Mixing ingredients lets you create something truly unique. Try adding a bit of sea salt for a sweet contrast or layer in some fruits for a refreshing crunch.
The endless combinations not only boost the flavors but also make your sandwiches look great. It’s all about experimenting and having fun!
Serving Suggestions for Chocolate Ice Cream Sandwiches

Serving chocolate ice cream sandwiches right from the freezer is key. It keeps each bite perfect. To make it even better, try these presentation ideas:
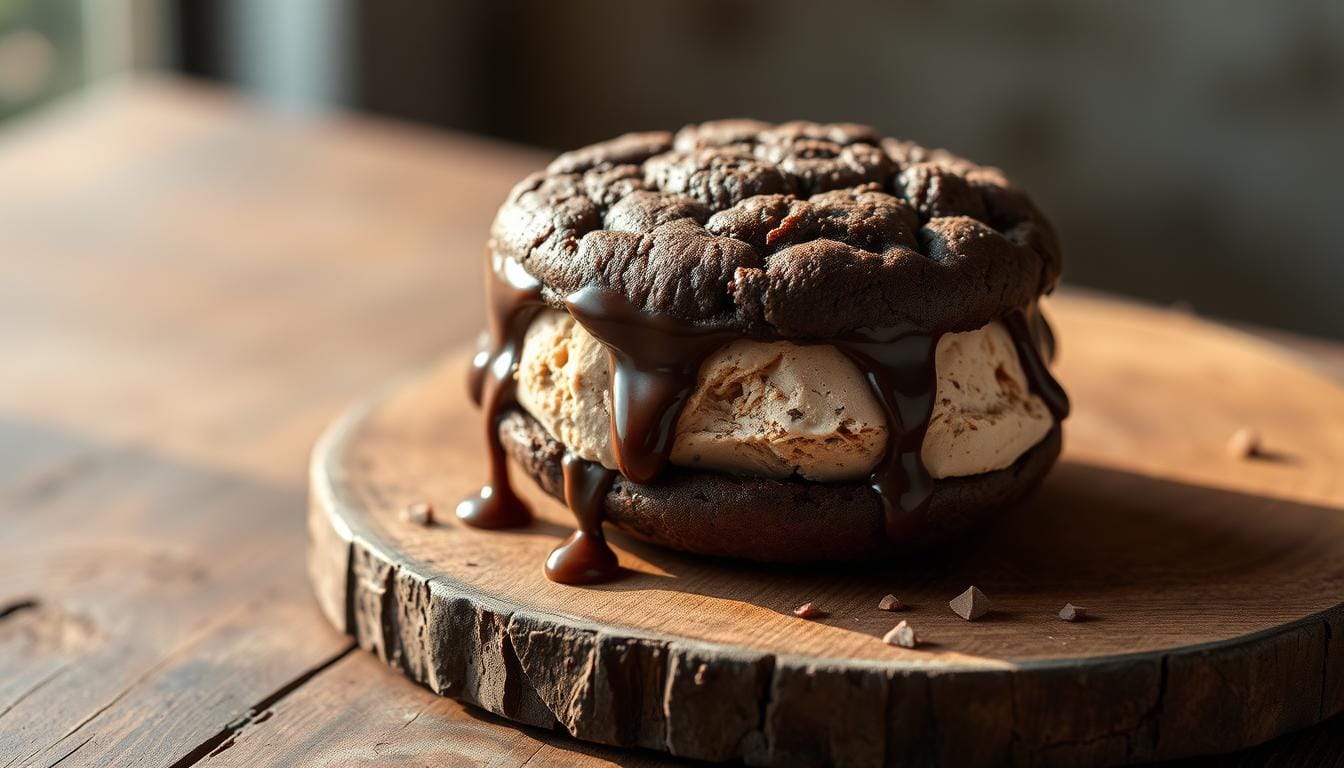
- Drizzle warm chocolate syrup over the top for a decadent finish.
- Accompany your sandwiches with fresh fruit, such as strawberries or raspberries, for a refreshing contrast.
- Serve on a colorful platter to make the dessert visually appealing at gatherings.
- Dust with powdered sugar for an elegant touch.
These treats are perfect for summer parties, family gatherings, or barbecues. Making them ahead of time means you can relax and enjoy with your guests. With these tips, your chocolate ice cream sandwiches will wow everyone!
The Perfect Occasions for Chocolate Ice Cream Sandwiches
Chocolate ice cream sandwiches are perfect for many occasions. They are great summer treats that cool you down on hot days. They bring joy to both kids and adults, making them perfect for parties and family gatherings.
They are great for celebrating special events or just enjoying a sunny day. These treats make any gathering more fun.
Consider these popular occasions for ice cream sandwiches:
- Summer barbecues with friends
- Kids’ birthday parties full of fun and laughter
- Family gatherings during lazy weekend afternoons
- Picnics at the park with loved ones
Chocolate ice cream sandwiches are customizable. You can mix and match cookies and ice cream flavors. This lets your guests try new and exciting combinations.
Tips for Creating the Best Chocolate Ice Cream Sandwich
To make the perfect chocolate ice cream sandwich, follow some key tips for ice cream sandwiches. First, pick high-quality Dutch-process cocoa powder. This will make your cookies taste richer and be softer, improving the whole experience.
When you’re putting it all together, speed is important. Work fast to avoid melting the ice cream, which can make a mess. Keep your cookie slabs cold before starting. Assembling on a frozen surface keeps the ice cream just right.
For a neat look, trim the edges of your sandwiches after you’ve put them together. This step not only makes them look better but also makes them all the same size. Your ice cream sandwiches will look as good as they taste.
| Tips | Description |
|---|---|
| Use Quality Ingredients | Select high-quality Dutch-process cocoa powder for better flavor and texture. |
| Work Quickly | Assemble sandwiches swiftly to keep ice cream from melting. |
| Cold Cookie Slabs | Chill the cookie pieces to maintain their firmness during assembly. |
| Trim Edges | Cut edges for a cleaner, more uniform appearance. |
Conclusion
Making your own Chocolate Ice Cream Sandwiches is a fun project. It adds to your dessert collection and lets you customize it. You can pick the best ingredients for the cookies and ice cream, making each bite special.
These treats mix the crunch of cookies with creamy ice cream. It’s a perfect mix of flavors and textures. It’s a treat that everyone will love.
When you make these, you can share them with your loved ones. Homemade chocolate treats are great for any time. They’re perfect for summer fun or cozy nights by the fire.
With this guide, you’re ready to make amazing Chocolate Ice Cream Sandwiches. Try new flavors and enjoy the process. The delicious outcome will be worth all the effort.