
Some tastes instantly bring back memories. The smell of sugar and roasted peanuts, the softness of a cookie, and the chocolate that melts in your mouth. These moments are why making peanut butter cookies at home is special. It’s about simple ingredients, quick steps, and sharing comfort.
This guide is for beginners and busy bakers. It starts with a three-ingredient recipe. Then, you learn how to add a pinch of sea salt, a splash of vanilla, or chocolate chips. These small changes make your cookies irresistible.
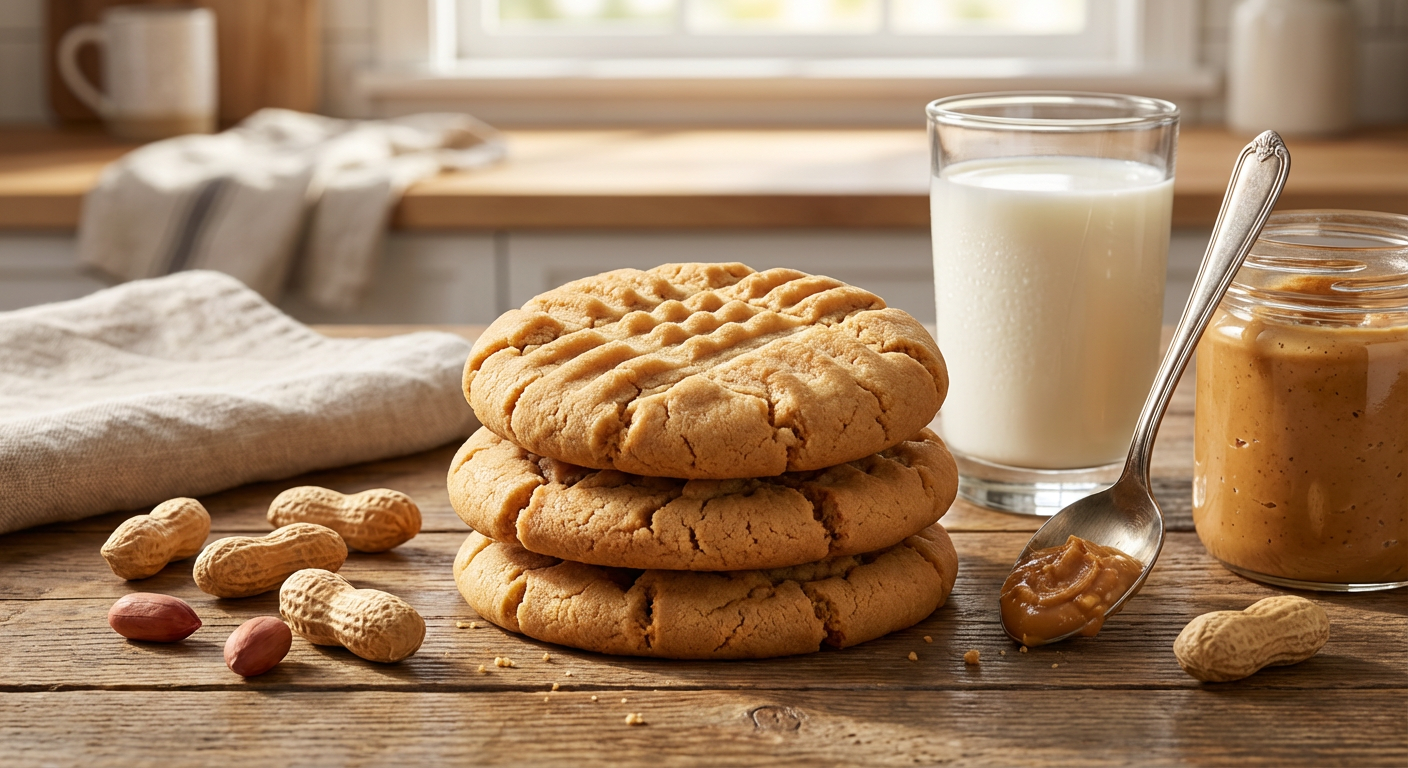
You’ll see how easy this recipe is. You’ll learn about using Jif or Skippy peanut butter for consistency. Plus, you’ll discover how to keep your cookies soft. By the end, you’ll know how to make chewy or spreadable cookies, depending on your preference.
Table of Contents
Key Takeaways
- The classic easy peanut butter cookies formula starts with peanut butter, sugar, and an egg for fast results.
- You can tweak texture with tiny changes: less peanut butter for more spread, extra egg for a softer center.
- Commercial peanut butter brands like Jif or Skippy give consistent dough; natural peanut butter can vary.
- Simple presentation—crisscross fork marks and a sprinkle of sugar—makes cookies shareable on platforms like Instagram.
- Store cookies in an airtight container at room temperature or freeze for longer keeping.
Classic peanut butter cookies recipe overview
This recipe is a hit on Instagram and in lunchboxes. It’s simple yet delicious. You only need a few ingredients to bake perfect cookies every time.
Why this recipe works
The recipe uses just three ingredients: peanut butter, sugar, and egg. This makes it easy to avoid mistakes. Using well-known brands like Jif or Skippy ensures the cookies turn out right.
Making small changes can affect the cookies in big ways. For example, reducing peanut butter makes them spread more. Adding another egg makes them moist and puffy. These tweaks are easy to do without making things complicated.
What to expect from the finished cookies
Bake the cookies at 350°F for about 12 minutes. They should have set edges but soft centers. Using commercial peanut butter helps them keep their shape.
Let the cookies cool a bit on the tray before moving them to a wire rack. Store them in an airtight container or freeze for up to two months. This method ensures your cookies are always delicious, whether you stick to the original recipe or try a few tweaks.
| Feature | Result | When to adjust |
|---|---|---|
| Three-ingredient base | Dense, chewy center with clear peanut flavor | When you want the classic peanut butter cookies experience |
| Use commercial peanut butter (Jif, Skippy, Peter Pan) | Reliable shape and texture, minimal spread | When you need consistent baking results |
| Reduce peanut butter by 2 tbsp | More spread, slightly thinner bite | When you prefer a flatter cookie |
| Add an extra egg | More moisture and puffiness, softer dough | When you want a cakier, less dense cookie |
| Bake time at 350°F ~12 minutes | Edges set, centers chewy after cooling | Standard timing for the best peanut butter cookies recipe |
| Storage | Airtight container at room temp or freeze up to 2 months | For making ahead or large batches |
Ingredients for the best peanut butter cookies
Choose ingredients for consistent texture and flavor. This guide lists what you need for reliable results. Plus, simple tweaks to make your cookies stand out. Use the grocery tags on Instagram to help friends find the same items.
Essential ingredients
Start with a tested base: 1 cup peanut butter, 1 cup granulated sugar, and 1 large egg. These three items make a classic cookie with ease. Brands like Jif, Skippy, and Peter Pan ensure consistent fat and texture.
Add a pinch of sea salt for balance and a teaspoon of vanilla extract for depth. Prepare a baking sheet with parchment paper to prevent sticking and enhance browning. Small changes, like removing 2 tablespoons of peanut butter, affect spread and density.
Optional add-ins to customize flavor and texture
For chewier cookies, use brown sugar or an extra egg. Chocolate chips are a great addition, blending well with peanut butter.
To reduce density, cut 2 tablespoons of peanut butter and add a tablespoon or two of flour. Natural peanut butter works, but stir out excess oil first. Small changes affect handling and bake time.
A typical cookie has about 168 kcal, with 17 g carbs, 5 g protein, and 9 g fat. Use these numbers for planning servings at events.
Kitchen tools and equipment you’ll need
Having the right tools makes baking peanut butter cookies easy and consistent. You don’t need expensive machines. Just a few reliable items will keep things smooth and the results great.
Baking tools
Begin with a strong mixing bowl and a silicone spatula or wooden spoon for mixing. Use measuring cups and spoons to ensure the right amounts.
Line a baking sheet with parchment paper or a silicone mat to prevent sticking and make cleanup easy. A fork is great for the classic crisscross pattern. A cookie scoop helps make uniform 1″ balls, ensuring even baking times.
Let cookies cool on a wire rack to avoid soggy bottoms and keep their texture. If you’re adding mix-ins like chocolate chips, have a small rubber spatula ready for mixing.
Tips for tool selection
Opt for a stainless steel or glass mixing bowl. They’re durable and easy to clean. Choose a silicone spatula that bends without tearing; it’s helpful for scraping peanut butter from the bowl.
For the best results, get a reliable oven thermometer and a medium-weight baking sheet. An accurate oven temperature is key to avoid overbaking.
If you want to prep on the go, a simple cookie scoop and resealable freezer bags make freezing dough easy. For quick Instagram posts, parchment and a wire rack help with presentation while you take photos.
Keep your list of tools for baking peanut butter cookies short and focused. The right equipment saves time and ensures delicious cookies every time.
Step-by-step instructions: how to make peanut butter cookies
First, let’s get a quick overview. These easy peanut butter cookie instructions are all about speed and success. Prep time is short, and baking takes about twelve minutes. Follow this guide to confidently complete each step.
Preparing the dough
Preheat your oven to 350°F and line a baking sheet with parchment. In a mixing bowl, combine 1 cup creamy peanut butter, 1 cup granulated sugar, and 1 large egg. Stir until it’s smooth and even.
If the dough is too sticky, use a cookie scoop instead of rolling. Reducing peanut butter by about 2 tablespoons can make the cookies spread more and be lighter. But, don’t add an extra egg; it makes the dough too soft.
Shaping and patterning
Make dough balls about 1 inch in size and place them two inches apart on the sheet. If you scooped, press each mound gently with a fork dipped in sugar to create the classic crisscross pattern.
Pressing after scooping helps keep shapes even if the dough resists rolling. These cookies don’t spread much, so you can fit a whole batch on one tray without overcrowding.
Baking and timing
Bake for 10–12 minutes, watching for edges to set and a pale golden color. For a bit more spread, bake for about 12 minutes and let cookies cool on the sheet for 1–2 minutes before transferring to a wire rack.
Let cookies rest on the sheet for about five minutes if you prefer a firmer bite. Store cooled cookies in an airtight container at room temperature or freeze for longer keeping. Use this step-by-step guide whenever you want to make peanut butter cookies with consistent results.

baking tips for chewy peanut butter cookies
These tips will help you make cookies with soft centers and crisp edges. Use visual cues, timing, and ingredient ratios to get the chewy cookies you desire. Small changes in temperature, timing, and ingredients can make a big difference.
preventing overbaking
Preheat your oven to a true 350°F. Check with an oven thermometer to avoid dry cookies. An inexpensive thermometer from Williams Sonoma or Target is a good investment.
Bake for 10–12 minutes until the edges are set but the centers are soft. This is a common tip seen on Instagram reels and baking videos.
Take the cookies out of the oven when the edges are firm and the centers wobble. Let them rest on the pan for 1–5 minutes. This helps them set without overbaking. Then, transfer them to a wire rack to cool completely.
Use uniform scoops and rotate the pan halfway through baking for even color. Baking different sizes together can lead to overbaked smaller cookies and underdone larger ones.
For the best texture, try the classic 1 cup peanut butter, 1 cup sugar, 1 egg ratio. This makes the cookies dense and chewy. Adding another egg will make them puffier and more cake-like.
If you prefer less density, reduce peanut butter by about 2 tablespoons. Stick with commercial brands like Skippy or Jif for consistent results. Natural peanut butter can be unpredictable due to separation.
Variations: easy peanut butter cookies to try
Start with a simple three-ingredient base and use it as a canvas for easy twists. You can showcase your takes on Instagram to gather feedback and refine recipes. Below are practical variations and small technique notes so you can pick the texture and flavor you prefer.
Chocolate chips are the quickest upgrade. Fold a handful of semi-sweet or milk chips into the standard dough for classic chocolate chip peanut butter cookies that balance sweet and nutty in every bite.
To make gluten-free peanut butter cookies, confirm your peanut butter label shows no cross-contamination and stick to the three-ingredient recipe. No added flour keeps the batter simple and naturally gluten-free for many diets.
For chewy peanut butter cookies, use the original single-egg formula and standard peanut butter. Swap part of the granulated sugar for brown sugar to deepen flavor and increase chewiness without changing the core recipe.
If you prefer cakey peanut butter cookies, add an extra egg. That creates puffier, more delicate cookies that set with a tender crumb. Small additions like a teaspoon of baking powder or a tablespoon of flour push the texture toward cake without big formula changes.
Small adjustments affect spread and density. Reduce peanut butter by about 2 tablespoons to increase spread and yield a slightly less dense bite. Add-ins like chopped peanuts or oats change mouthfeel and make each variation distinct.
Try this lineup on different bake sheets and temperatures. Use darker pans for faster browning in chocolate chip peanut butter cookies. For gluten-free peanut butter cookies, check doneness a minute earlier as some mixes brown faster.
Use these variations to build a repertoire. Post photos, note oven times, and repeat tests until your version matches your goal—chewy, cakey, or studded with chocolate chips.
Ingredient substitutions and dietary adjustments
Want to tweak the recipe for texture, taste, or dietary needs? Small changes can make a big impact. Choose substitutions that fit your dietary preferences and desired cookie taste. Test each change one at a time to ensure consistent results.
Using natural peanut butter
Natural peanut butter can be a good substitute, but it’s different from brands like Jif, Skippy, or Peter Pan. It often separates, making dough too loose.
Make sure to mix natural peanut butter well before measuring. If the dough seems too oily or soft, refrigerate it for 20 to 60 minutes. This helps firm up the fat and prevents cookies from spreading too much during baking.
For consistent results, commercial brands are often recommended. But, many bakers successfully use natural peanut butter by adjusting chilling times and reducing added fat.
Lower-sugar and allergy-friendly swaps
To make cookies with less sugar, cut down granulated sugar by up to 25%. You can also use erythritol or monk fruit blends. Keep an eye on the dough, as sugar affects spread and chew. Adding brown sugar can help if cookies feel too dry.
For allergy-friendly cookies, sunflower seed butter and soy-based nut butters are good substitutes. They change the flavor and color. Seed butters are softer, so chill the dough to control spread.
For vegan cookies, replace one egg with a flax egg (1 tablespoon ground flax + 3 tablespoons water). This can alter chew and structure, so adjust baking time. Always check labels for gluten-free certification when making gluten-free cookies.
- Tip: Test allergy-friendly or gluten-free cookies in small batches first to check texture and flavor.
- Tip: When using sugar substitutes, bake a small batch to check spread before making a full batch.
Storage and freezing instructions for homemade peanut butter cookies
Keep your cookies fresh with easy steps for busy kitchens. Let them cool completely on a wire rack. Then, follow these tips for short-term and long-term storage to keep them crunchy and flavorful.
Short-term storage
Store cooled cookies in an airtight container at room temperature. Use a single layer or separate layers with parchment to prevent sticking. For soft cookies, add a slice of apple or a small square of bread to the container to maintain moisture balance without making them soggy.
Keep containers away from direct sunlight and heat. At room temperature, your homemade peanut butter cookies storage will stay fresh for about 4 to 5 days. Label the container with the bake date so you know when to finish them off.
Freezing for longer storage
Freezing peanut butter cookies is a great option for longer storage. Place cooled cookies in a single layer on a baking sheet and freeze until firm. Then, transfer frozen cookies to an airtight container or freezer bag, separating layers with parchment. Label with the date.
Cookies will keep quality for up to 2 months in the freezer. To thaw, leave them at room temperature for 30 to 60 minutes. If you want just-baked warmth, rewarm frozen cookies in a 300°F oven for a few minutes.
You can also freeze dough for baking later. Scoop dough balls onto a tray, freeze until firm, then move them to a freezer bag. When ready, bake from frozen and add one to two minutes to the bake time. This method makes freezing peanut butter cookies quick and simple while preserving texture and flavor.
Common mistakes and how to avoid them
Small changes in the dough and bake time can fix many issues. Look at Instagram and baking forums and you’ll see common problems. These include dense texture, crumbly edges, and spreading too much. This guide will help you spot and fix these issues quickly.
Why cookies become too dense or too crumbly
Dense cookies often come from using too much peanut butter. If your peanut butter is very thick, your dough will be heavy. Overmixing and not enough sugar can also make cookies dense.
Crumbliness usually comes from overbaking or a dry mix. Natural peanut butter can be dry if not mixed well. To avoid crumbly cookies, check the dough’s moisture and watch the bake time closely.
Fixing spread and texture problems
If cookies don’t spread, try using a bit less peanut butter. Reducing peanut butter by 2 tablespoons helps the dough relax. Pressing the dough slightly before baking also helps cookies spread evenly.
For cookies that spread too much, chill the dough briefly. Make sure your peanut butter is cool. Cutting down on liquid and avoiding warm nut butter helps too.
Quick rescue moves while baking
To fix cookies that look done but are soft in the center, remove them when edges are set. They will firm up as they cool. This trick is great for fixing cookies quickly when time is short.
To fix dry, crumbly dough, add a splash of milk or an extra egg yolk. This adds moisture without changing the flavor. These steps help fix dense cookies and prevent crumbly ones.
Checklist to avoid common baking mistakes peanut butter cookies
- Measure peanut butter by volume carefully; reduce by 2 tablespoons if dough looks heavy.
- Stir natural peanut butter so oil is reincorporated before measuring.
- Avoid overmixing once flour is added.
- Watch edges for doneness; remove with centers slightly soft.
- Chill a too-soft dough for 10–20 minutes to control spread.
Serving suggestions and pairing ideas
When you plate cookies, think about contrast and comfort. A warm batch of delicious peanut butter cookies tastes best with a simple, classic pour of milk. For social posts, photograph a close-up on a wire rack to show the crisscross pattern and texture.
Classic pairings
You can pair these treats with coffee, black tea, or a cold glass of milk for a timeless combo. For an indulgent twist, sandwich cookies around vanilla ice cream or drizzle chocolate sauce over a stack.
Salted caramel and dark chocolate create a sweet-salty balance that highlights the peanut flavor. Use short notes on a gift tag to suggest reheating briefly at 300°F for best results when serving later.
Presentation tips
Presentation peanut butter cookies becomes effortless with simple props. Line a platter with parchment or a paper doily, then stack cookies in tidy piles or arrange them in neat rows.
Sprinkle a few sea salt flakes on warm cookies for a finishing touch. For gifting, place cookies in a labeled cookie box and include brief reheating instructions. These small moves make serving peanut butter cookies feel polished and personal.
Recipe troubleshooting based on reader-tested tips
If your cookies don’t turn out right, small changes can fix it. Use this quick guide to fix spread, chew, and flavor. Home bakers have shared simple fixes that work.
Reader variations that worked
Many found the 3-ingredient method easy to work with. Adding 1 teaspoon vanilla makes the flavor better without changing the texture. A pinch of sea salt on top balances the sweetness.
To make cookies chewier, add a second egg. This makes them gooier and puffier. For more spread, remove 2 tablespoons of peanut butter or press the dough flat before baking. Adding a small handful of chocolate chips gives a classic twist.
Notes on ingredient brands
Readers say commercial peanut butter brands like Jif, Skippy, and Peter Pan work best. They offer consistent texture and predictable spread. Natural peanut butter can work but might change the spread and need extra stirring or a binder.
| Issue | Reader-tested fix | Why it works |
|---|---|---|
| Cookies too flat | Chill dough 10–20 minutes or remove 2 tbsp peanut butter | Cold dough spreads less; less fat reduces excessive spread |
| Cookies too cakey | Use one egg only and bake 10–12 minutes | Less moisture yields denser crumb and shorter bake locks texture |
| Edges too hard | Bake closer to 10 minutes and let cool on sheet 5 minutes | Shorter bake keeps soft centers while cooling completes setting |
| Flavor flat | Add 1 tsp vanilla or a pinch of flaky sea salt | Vanilla lifts notes; salt enhances peanut richness |
| Inconsistent spread | Use Jif, Skippy, or Peter Pan for uniform results | Commercial brands have consistent oil and sugar balance |
| Storage concerns | Store airtight; freeze up to 2 months | Airtight containers retain moisture; freezing preserves texture |
For ongoing troubleshooting peanut butter cookies questions, keep notes on brand, oven time, and minor tweaks. Your log will turn reader-tested peanut butter cookie tips into a reliable routine. Tracking peanut butter cookie brands and small adjustments helps you repeat the results you prefer.
Conclusion
You now know how to make delicious peanut butter cookies every time. Start with a simple mix of 1 cup peanut butter, 1 cup sugar, and 1 egg. Bake them at 350°F for 10–12 minutes for quick cookies.
For the best results, use a commercial peanut butter for a consistent texture. Or, use natural peanut butter and chill the dough to control how spread out they get.
The classic recipe makes chewy, nostalgic cookies. But, you can make them your own by tweaking the recipe. Try reducing peanut butter, adding vanilla, or adding chocolate chips. You can also add an extra egg for puffier cookies.
These changes let you customize your cookies to be chewy or lighter. They’re easy to make, no matter your baking skill level.
To keep cookies fresh, store them in an airtight container at room temperature. Or, freeze them for up to two months to keep their texture and flavor. With this guide, you can make, adapt, and store cookies that look great on Instagram and taste amazing.
Enjoy experimenting and making the recipe your own. Have fun!